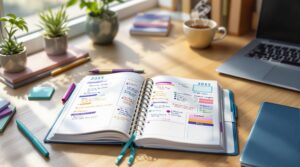
Want a planner that truly works for you? Make your own! A DIY planner is budget-friendly (around $20) and can help you stay organized, reduce stress, and even boost productivity. Plus, it’s completely customizable to your style and needs. Here’s how to get started:
Whether you’re tracking goals, managing tasks, or adding creative flair, your DIY planner can grow with you. Ready to create one that fits your life perfectly? Let’s dive in!
Choosing the right planner format is key when creating your DIY planner. Each format caters to different planning needs and styles.
Daily Planners dedicate an entire page to each day, making them great for detailed schedules and creative touches. If you juggle multiple tasks or enjoy adding sketches, stickers, or lengthy notes, the extra space will suit you perfectly.
Weekly Planners provide a weekly overview, offering a balanced approach to planning. Options include vertical layouts with hourly time slots, horizontal spreads for more writing room, or two-page layouts with memo sections.
Monthly Planners give a high-level view of your schedule on a single spread. These are perfect for tracking deadlines, appointments, and setting long-term goals.
Think about your daily routine and planning habits to decide which format fits you best.
Pick a format that suits your lifestyle and planning approach. A well-chosen planner can help you stay organized and reflect your personal style.
| Format Type | Best For | Space Per Day | Ideal User |
|---|---|---|---|
| Daily | Detailed scheduling | One full page | Note-takers, creative journalers |
| Weekly | Balanced overview | One-seventh page | Multi-schedule managers |
| Monthly | Big-picture planning | Small box | Project planners, minimalists |
"The freedom to design and put whatever I want in my planner however I want is one of the reasons I enjoy it so much." – Design Time Simplicty
Here are a few practical tips to guide your choice:
Starting your DIY planner? You’ll need some essential tools to create neat, well-organized pages while adding a touch of personality.
Must-Have Tools:
Add Some Style:
Make sure to test your pens on your planner paper to avoid ink bleeding. Once you’ve got the basics, you can hunt for unique decorative items to truly make your planner your own.
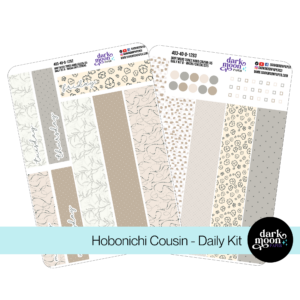
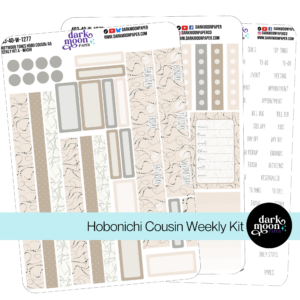
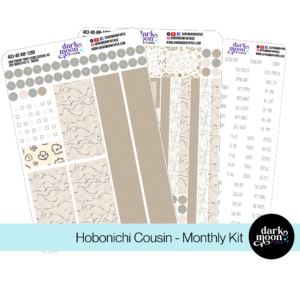
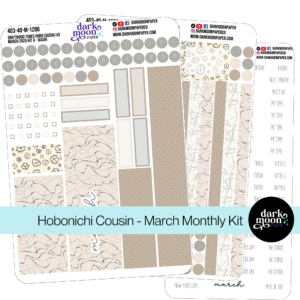
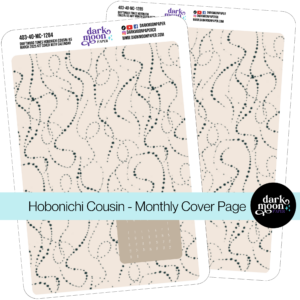
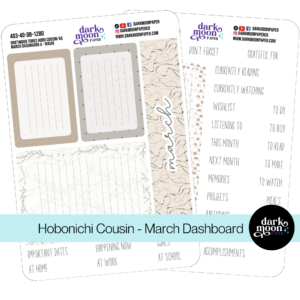
High-quality decorative supplies can elevate your planner and keep it looking great all year long. Check out Dark Moon Paper, founded by Rachael Snow, for a variety of sticker collections that suit different planner themes. Here are some of their popular options:
If you’re in the U.S., you can enjoy free shipping on orders over $35 when purchasing directly from Dark Moon Paper’s official website. International buyers can explore their Etsy shop for more shipping choices.
| Supply Type | Features to Look For | Tips for Use |
|---|---|---|
| Sticker Kits | Pre-matched color schemes | Pick themes that fit your style |
| Washi Tape | Easy-to-remove adhesive | Test adhesion before applying |
| Markers | Fast-drying ink | Store horizontally to last longer |
| Storage Tools | Transparent containers | Keep everything visible and tidy |
Your color choices set the tone for your planner. Pick colors that resonate with you. For example, Dark Moon Paper’s "Lilac Dusk" collection blends soft purples with neutral grays, creating a calm and inviting atmosphere.
Use a mix of main, neutral, and accent colors to create a clear visual structure. This helps highlight important sections while keeping the design balanced.
"Finding the perfect planner can be hard. But you don’t have to spend a lot of money to get the one that is perfect for you. Sometimes what you need is closer than you think." – Kayla Fink
Once you’ve chosen your colors, design your pages to match the theme.
A well-organized layout makes your planner both useful and inspiring. Canva offers free templates that simplify the process of creating custom pages.
Key elements to include:
Set your Canva document to fit your planner size – A5 (5.8 × 8.3 inches) is common – and leave a 0.5-inch margin for binding.
Adding small artistic elements can make your planner feel more personal and visually engaging. Even simple designs can make a big difference. Try these ideas:
For stylish headers, practice faux calligraphy using any pen you have. The Postman’s Knock offers free worksheets featuring the Amy Style alphabet, perfect for enhancing your lettering skills.
Place your art thoughtfully to draw attention to key details without overwhelming the page.
Now that your pages are ready, let’s focus on making your planner more visually appealing.
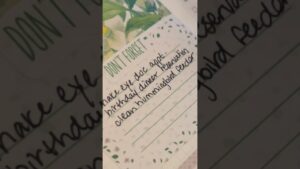
Crafting clear and eye-catching section headers is easier than you think. Use a ruler to draw straight lines, sketch your header in pencil, and then trace over it with a fine-tip marker for a polished look. If you want a quicker solution, pre-made header stickers can give your planner a neat and consistent style.
Stickers can bring your planner to life while keeping it functional. Themed sticker sets are great for creating a unified design. Here’s how to use them effectively:
Once your stickers are placed, you can add some personal flair with simple artistic touches.
Enhance your planner with a few easy art techniques. These small details can make your pages feel more personal and unique.
Turning planning into a daily routine can make your planner an essential tool. Pick a specific time each day – early mornings or evenings often work well – and stick to it. Keep your planner in a spot where you’ll see it often, like your desk or nightstand, as a gentle nudge to use it. Start small by jotting down just a few tasks each day, then gradually expand as it feels more natural. To help, set a daily reminder until it becomes second nature. These small steps will complement any layout or design choices you’ve made.
Your planner should grow with you. If some sections aren’t being used or new priorities come up, tweak your layout to fit your current needs. Here are a few tips to refresh your pages:
Adapting your planner ensures it stays functional and aligned with your schedule.
When you’ve filled up a planner, don’t just toss it aside – store it thoughtfully. Dedicate a section of your bookshelf to display completed planners, or organize them in labeled memory boxes for easy reference. You can group them by year and clearly mark each box to keep everything tidy. If certain pages hold special meaning, consider saving them in a shadow box for a personal touch. It’s a great way to keep memories alive while staying organized.
Creating your own DIY planner goes beyond just staying organized – it’s a way to boost productivity while expressing your individuality. Jessica Fisher from Life as Mom puts it perfectly:
"A personal planner is a powerhouse just waiting to be unleashed. It can hold all your goals, hopes, and dreams inside its pages".
Studies show that writing down goals helps achieve them faster. Your planner becomes more than just a tool – it’s your personal space for creativity and productivity. By including sections for goal tracking, habits, and daily to-dos, you’re building something that fits your life like a glove.
Starting with something as simple as a 3-ring binder can be a great first step. Priceless Planners highlights the benefits of this approach:
"Using a custom planner can also help improve mental health by providing structure and routine. Having an organized plan helps create peace of mind which then leads to improved mental clarity, reduced stress levels, and better sleep habits".
From there, you can make it truly yours by adding practical and inspiring touches, such as:
These additions ensure your planner can grow and change as your needs do.
The best part? You’re in control. Whether you lean toward clean, simple layouts or intricate designs, your planner should match your personality while keeping you on track. Start designing a system that’s not just functional but also uniquely yours.

Stickers Made for Planning
Our custom stickers are a fuss-free way to brighten up your planner pages with perfectly-sized designs that add a spark of personality to every layout.
Why use planner stickers?
Planner stickers make organizing easy, fun, and personal! Add color, creativity, and structure to every page, transforming your planner into a tool that reflects you. Perfect for tracking, decorating, and staying inspired daily!


Hello and welcome!
I’m Rachael Snow, a lifelong artist and entrepreneur, and I started Dark Moon Paper to blend my love of art, technology, and the mysterious beauty of the world around us. My sticker kits are meant to set the mood, tell a story, and give you a little escape from the ordinary.
I work from my cozy studio tucked away in the beautiful woods of Oregon, surrounded by nature and a dark night sky full of stars.