A well-customized planner can help you stay organized, productive, and motivated. Whether you use a Hobonichi Weeks, Erin Condren, or a bullet journal, the key is personalizing it to fit your life. Here are 10 simple ways to set up your planner:
Start with one or two ideas and build from there. Your planner should be functional, easy to use, and reflect your personality. Let it grow with you as your needs evolve!
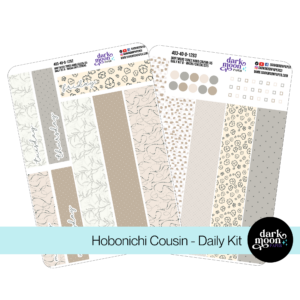
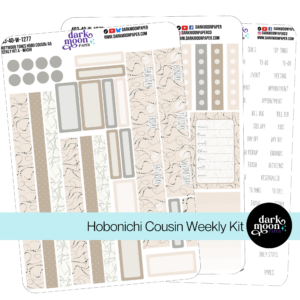
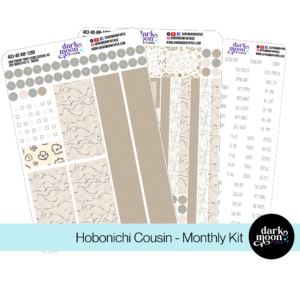
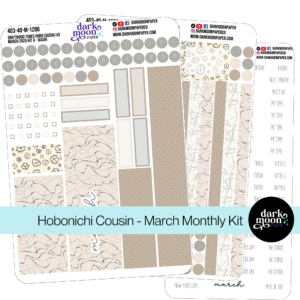
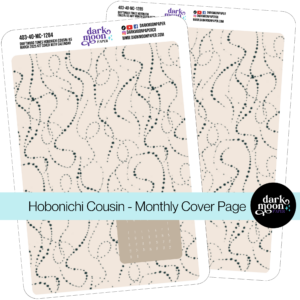
Themed sticker kits are a great way to bring personality to your planner while keeping it organized and visually consistent. These curated collections help you balance style with practicality, making your layouts both functional and appealing.
Stay Organized with Stickers
Use stickers to color-code tasks for better clarity. For example:
To stay consistent, create a sticker key on the first page of your planner. This will make it easier to quickly identify tasks throughout the year.
Picking the Right Stickers
Choose kits that match your planner’s size and layout. Collections like "Lilac Dusk" and "Electric Forest" from Dark Moon Paper are designed for popular planners such as Hobonichi Weeks and Erin Condren layouts.
| Sticker Type | Purpose | Best Use Cases |
|---|---|---|
| Headers | Organizing sections | Weekly or monthly titles |
| Icons | Categorizing tasks | Tracking appointments |
| Boxes | Managing tasks | To-do lists and reminders |
| Decorative | Adding flair | Highlighting special dates |
How to Apply Stickers
Start by placing essential stickers like headers and date markers. Once those are in place, add decorative stickers to highlight special events or separate sections. Keep some white space in your layout to avoid making it look cluttered or hard to read.
After setting up your sticker system, you can add extra touches like washi tape to make your planner even more visually appealing.
Washi tape is an easy way to add a personal touch to your planner while keeping things organized. This Japanese masking tape offers a mix of style and function, making it ideal for sprucing up your planner layouts.
Ways to Use Washi Tape
Here are a few ideas to make the most of washi tape in your planner:
| Washi Tape Width | Best Uses | Placement Tips |
|---|---|---|
| 3mm-5mm | Small details, mini tabs | Great for edges or bullet points |
| 10mm-15mm | Section dividers, borders | Perfect for headers or margins |
| 20mm+ | Bold designs | Ideal for cover pages or monthly dividers |
Tips for Clean Application
For a polished look, fold the tape over page edges to create labeled tabs for sections you use often. Popular brands like MT Washi Tape and Dark Moon Paper offer coordinating patterns that keep your layouts visually consistent. To ensure neat edges, work on dry surfaces and use sharp scissors.
Once your planner is decorated with washi tape, consider adding a color-coding system to make everything even easier to follow.
Adding a color-coding system to your planner can make it easier to stay organized and quickly spot priorities. By assigning specific colors to different types of tasks, you’ll create a visually clear and efficient planning tool.
Here’s a simple guide to get started:
| Category | Suggested Color | Use |
|---|---|---|
| Work Tasks | Blue | Meetings, deadlines, projects |
| Personal Tasks | Green | Appointments, errands, self-care |
| Urgent Items | Red | Time-sensitive tasks, critical deadlines |
| Social Events | Purple | Gatherings, celebrations, calls |
| Health & Fitness | Orange | Workouts, medical appointments |
Stick to 5-7 colors to avoid clutter, and keep a small color key in your planner for easy reference. Tools like Zebra Mildliners, Staedtler Triplus Fineliners, or Tombow Dual Brush Pens work well with most planners and provide smooth, bleed-resistant results.
Tips for Success:
Once your color-coding system is set, you can experiment with other creative ways to make your planner more personalized and functional.
Adding different journaling techniques to your planner can make it more personal and visually engaging, while still keeping it functional. These methods offer a mix of creativity and organization to enhance your planning experience.
| Technique | Purpose | Best Used For |
|---|---|---|
| Doodling | Adds visual flair | Headers, margins, decorative elements |
| Hand Lettering | Highlights key info | Important dates, section titles |
| Memory Keeping | Captures memories | Special events, milestones, reflections |
Spice up your layouts with simple doodles or hand lettering. Start small – try basic shapes or block letters – and gradually work up to more detailed designs. Tools like Tombow Dual Brush Pens (dual-tip markers perfect for lettering) can help you create polished designs. If you’re using a bullet journal, the dot grid is a great guide for keeping your patterns neat and consistent.
Dedicate a section in your weekly spreads to document special moments. You can include keepsakes like photos, ticket stubs, or quick sketches. To tie it all together, consider using themed sticker kits like Dark Moon Paper’s "Electric Forest" for a cohesive look across your layouts.
The goal is to enhance your planner without sacrificing its functionality. Once you’re comfortable, mix in extras like stickers or washi tape for even more personalization.
An index makes it simple to find key sections in your planner. Creating a personalized index not only keeps everything organized but also adds a touch of your own style.
| Section Type | Include These Items |
|---|---|
| Monthly | Calendar, key goals |
| Collections | Projects, lists, trackers |
| Special Pages | Notes, events, important details |
Break your index into clear categories based on your needs, such as monthly calendars, weekly spreads, or general notes. Adding subtle color highlights can help you differentiate categories without cluttering the design.
Incorporate icons or washi tape to make your index more visually appealing, but keep decorations minimal to ensure it stays easy to read.
Group related pages under shared headings for smoother navigation. For instance, place all project-related pages together in your index, even if they’re scattered throughout the planner.
Once your index is in place, you can focus on refining other features, like your habit trackers or goal-setting pages.
Habit trackers can turn your planner into a tool for building consistent routines while helping you stay on top of your goals. By tracking habits creatively, you can personalize your planner and boost your productivity.
| Tracker Style | Best For | Setup Tips |
|---|---|---|
| Grid Format | Monthly habits | Create a grid with boxes for each day and list habits in a column on the side. |
| Weekly Bar | Short-term goals | Draw horizontal bars and fill in daily progress as you go. |
| Checkbox List | Daily routines | Write habits vertically with checkboxes for each day. |
| Mini Trackers | Small spaces | Use symbols or dots in your weekly spreads to track habits. |
Start small – choose 3-4 habits that align with your goals, like drinking water, exercising, or reading. Place your tracker where it’s easy to see, such as in your weekly spread or next to your monthly calendar. To make it visually appealing and functional, consider:
If you’re working with a structured planner like Hobonichi Weeks, the built-in grid paper makes it easy to create neat, well-aligned trackers.
Make sure your tracker is easy to use daily. For weekly spreads, reserve a small section at the bottom of each day. For monthly tracking, dedicate a full page next to your calendar. If you want to save time, pre-made tracker elements from brands like Dark Moon Paper can help you maintain consistent layouts.
Once your habit tracker is ready, you’ll have more time to focus on other planner sections, such as your monthly or weekly spreads.
Turn your monthly spreads into a powerful planning hub that reflects both your needs and personal flair. These layouts act as your go-to space for tracking events, goals, and tasks at a glance.
| Component | Purpose | Customization Ideas |
|---|---|---|
| Calendar View | Track events | Add color codes, icons, or mini habit trackers |
| Task Section | Manage to-dos | Use priority labels or deadline markers |
| Goals Area | Monitor progress | Try progress bars or milestone markers |
| Bills Tracker | Plan finances | Highlight payment deadlines with custom icons |
Make your monthly spread visually engaging with creative layouts and themed designs. Stickers, headers, and decorative touches can help organize areas for events, tasks, and goals while keeping it visually appealing. A consistent theme can tie everything together seamlessly:
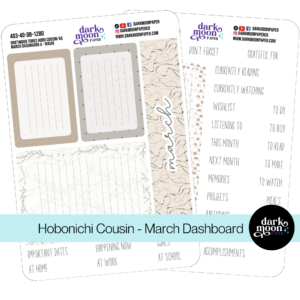
Make your spread work harder for you by including extras like bill trackers, cleaning schedules, or habit trackers. Surround your calendar with must-have dashboard elements to keep everything accessible yet tidy. Use blocks for key areas like important dates, goals, habits, and expenses, while leaving room in the margins for notes or last-minute updates.
Once your monthly setup is ready, you can dive into creating detailed weekly spreads to fine-tune your planning.
Weekly spreads act as your go-to space for managing daily schedules, tasks, and notes. A well-thought-out layout can help you stay on top of everything while keeping it visually appealing and easy to use.
Break your weekly spread into clear sections to keep things organized. Focus on areas for appointments, tasks, and notes. Adding tools like time blocks, priority markers, or habit trackers can make your layout even more effective.
| Component | Purpose | Tips for Customization |
|---|---|---|
| Daily Blocks | Track appointments | Use time blocks or vertical hourly layouts |
| Task Areas | Manage to-dos | Create zones for different priority levels |
| Notes Section | Capture quick thoughts | Use sticky notes for added flexibility |
| Habit Space | Track daily routines | Include a small tracker with checkboxes |
Consider splitting the page: use the left side for time-sensitive appointments and the right for tasks that can be done anytime. To make things clearer, try color-coding or using symbols for different activities.
Make sure to leave some blank space for unexpected tasks or changes. A compact planner like the Hobonichi Weeks is a great example of balancing structure with flexibility, offering space for both planned and unplanned activities [1].
Whether you’re planning for work or personal goals, create dedicated sections for meetings, deadlines, or anything else that matters. This ensures your weekly spread covers all aspects of your life.
Check in regularly to see if your layout is working for you. Once you’ve nailed the structure, you can turn your attention to adding creative touches to other parts of your planner, like your note pages.
Note pages in your planner can do so much more than just hold random notes. With a little creativity, they can become practical and visually appealing spaces that make your planning more effective.
Turn blank pages into purposeful sections by organizing them based on your needs. Here are some ideas:
| Zone Type | Purpose | Tips for Setup |
|---|---|---|
| Brain Dump | Jot down random thoughts | Use sticky notes for temporary ideas |
| Project Planning | Keep track of projects | Draw boxes for different stages |
| Lists & Collections | Store lists you revisit | Add tabs for quick reference |
| Reflection Space | Celebrate achievements | Highlight monthly wins |
A dedicated brain dump section can help clear your mind while keeping your planner tidy. Use this space to jot down anything and everything, then sort your thoughts into relevant sections later.
Make your note pages both useful and visually pleasing with these tips:
To keep your note pages functional:
For added flexibility, try removable tools like sticky notes or sticker kits. These let you adjust your layout while keeping everything neat and visually appealing.
With well-organized note pages, you can shift your focus to planning events or trips, ensuring nothing gets overlooked.
Your planner can do more than just track daily and monthly tasks – it’s a great tool for organizing trips and events. By setting aside space for these, you can make your planner match your lifestyle and priorities.
Set up travel sections in your planner with key details like:
| Section | Purpose | What to Include |
|---|---|---|
| Planning Essentials | Organize your trip | Packing lists, reservations, daily itinerary, and activities |
| Budget | Keep track of finances | Expense tracking, currency conversions |
| Memory Log | Capture trip memories | Photos, keepsakes, and notes |
For events, create sections to track important details. Graph paper can help with structured layouts, and themed stickers can make each event stand out visually.
Here are a few ways to make your travel and event pages easy to use:
Color-coding can help you keep everything organized. Assign different colors for personal trips, work events, family gatherings, and celebrations. This system works perfectly with your weekly layouts, giving you a clear view of how events fit into your schedule.
When your travel and event plans are sorted, your planner becomes a tool that supports every part of your life.
Making your planner your own turns it into a tool that truly matches your lifestyle and goals. Whether you use a Hobonichi Weeks, Erin Condren planner, or a bullet journal, these ten ideas are practical ways to improve both your organization and personal flair.
Start small. Try one or two methods – maybe stickers or color-coding – and see how they fit your planning style. Over time, you can add more techniques to create a system that works just for you. Each idea can be adjusted to meet your needs, whether you’re focused on staying organized or adding a touch of creativity.
Keep it functional. Make sure you leave enough room to write and avoid over-decorating, which can make daily use harder. The goal is to create a layout that helps you stay productive while still reflecting your personality.
Let your planner grow with you. Use these suggestions as inspiration, not strict rules. Tweak them to fit your workflow and priorities. A good planner setup blends organization with personal style, giving you a system that supports both your daily tasks and long-term goals.
Your planner is more than just a tool – it’s a reflection of your life and what matters to you. As you try out these techniques, focus on what feels right for you and let your system evolve naturally over time.
If you’re looking for more tips on starting or improving your layout, check out the FAQs below!
Designing a planner layout that works for you involves balancing practicality and personal style. A good starting point is a weekly spread. Divide each day into three sections – morning, afternoon, and evening – to keep your schedule organized. If you’re using Hobonichi Weeks, try using the left page for your weekly plans and the right page for tasks and notes [1].
Here are some key elements to include in your layout:
As mentioned in Section 3, tools like colored pens or highlighters can make it easier to categorize tasks. Pair these with creative touches like stickers, washi tape, or custom indexes for added flair and better organization.
The goal is to create a layout that works for you. By combining practical strategies with creative ideas shared earlier, you can craft a planner that’s both efficient and reflects your personal style.
Stickers Made for Planning
Our custom stickers are a fuss-free way to brighten up your planner pages with perfectly-sized designs that add a spark of personality to every layout.
Why use planner stickers?
Planner stickers make organizing easy, fun, and personal! Add color, creativity, and structure to every page, transforming your planner into a tool that reflects you. Perfect for tracking, decorating, and staying inspired daily!
Hello and welcome!
I’m Rachael Snow, a lifelong artist and entrepreneur, and I started Dark Moon Paper to blend my love of art, technology, and the mysterious beauty of the world around us. My sticker kits are meant to set the mood, tell a story, and give you a little escape from the ordinary.
I work from my cozy studio tucked away in the beautiful woods of Oregon, surrounded by nature and a dark night sky full of stars.