Want to set up the perfect planner? Here’s how to make it functional, personalized, and easy to use. Follow these 10 simple tips to stay organized and motivated every day:
Quick Comparison Table:
| Tip | Purpose | Key Tools/Methods |
|---|---|---|
| Choose Format | Foundation of planning | Traditional, Bullet Journal, Hybrid |
| Add Stickers/Themes | Organization + Aesthetics | Stickers, Washi Tape |
| Journaling Techniques | Reflection + Tracking | Mood Logs, Habit Trackers |
| Design Layout | Usability + Balance | Time Blocks, White Space |
| Track Habits/Tasks | Consistency + Progress | Grids, Symbols, Checklists |
| Personalize Planner | Motivation + Style | Covers, Tabs, Color Coding |
| Use Right Tools | Efficiency + Neatness | Pens, Highlighters, Sticky Notes |
| Future Log | Long-term Planning | Calendars, Notes, Goal Checkpoints |
| Define Goals | Clarity + Focus | SMART Goals, Color Coding |
| Evaluate/Adjust | Continuous Improvement | Monthly Reviews, Adjust Layout |
Start simple, personalize over time, and regularly refine your planner to stay productive and inspired!
Picking the right planner format can make or break your planning routine. The most common options are traditional pre-designed planners and customizable bullet journals. Each caters to different needs and preferences, so it’s all about finding what fits your style.
Traditional planners come with pre-made layouts that require little to no setup. Take the Hobonichi Weeks, for example – it combines a weekly schedule on the left with grid paper for notes on the right [2]. This setup is ideal for professionals who want a no-fuss, ready-to-use system.
Bullet journals, on the other hand, require more effort upfront but offer complete flexibility to design a system that works for you [1]. Your choice here is key, as it sets the foundation for everything else.
Here’s a quick breakdown to help you decide:
| Format Type | Best For | Time Investment |
|---|---|---|
| Traditional Planners | Structured schedules, busy lives | Low (ready to use) |
| Bullet Journals | Creative minds, evolving needs | High (requires setup) |
| Hobonichi Weeks | Minimalists, balance seekers | Medium (some customization) |
Pick a format that fits naturally into your daily life. Many people prefer physical planners because the act of writing by hand boosts focus, reinforces commitments, and improves memory retention [1].
Once you’ve settled on a format, you can personalize it with stickers, themes, or other creative touches to make it your own.
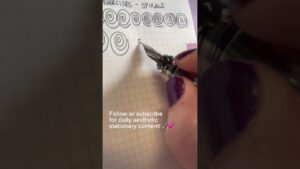
Once you’ve chosen your planner format, it’s time to make it both useful and visually appealing. Stickers can help you stay organized, highlight important details, and create a layout that inspires you to use your planner every day.
Using coordinated sticker sets can make it easier to match colors and styles. Check out themed sticker collections from well-known stationery brands or independent creators on platforms like Etsy for a cohesive look.
When placing stickers, think about both how they look and how they function. Here’s a quick guide to help you:
| Purpose | Sticker Type | Best Placement |
|---|---|---|
| Task Management | Checkboxes & Dots | Daily Task Areas |
| Important Dates | Headers & Icons | Top of Pages |
| Section Division | Washi Tape | Page Borders |
| Decoration | Themed Elements | Empty Spaces |
Pro tip: Pair fine-point pens that won’t bleed through your pages with thin washi tape for a neat, polished look [2].
The trick to using stickers effectively is spacing. Leave enough room for writing while keeping the layout visually appealing. Choose stickers that match your planner’s purpose – neutral tones for professional use and bold, colorful designs for personal planning [3].
To stay organized, create a simple visual system. For example:
Keep in mind that less is often more. Overloading your planner with stickers can make it feel cluttered and harder to use [1].
Functional stickers like tabs, checklists, and trackers can make navigation easier and improve organization [3]. These elements not only make your planner look better but also help it work more efficiently for your daily needs.
With your layout ready, you can now explore creative journaling techniques to add even more personality and purpose to your planner.
Journaling techniques can make your planner a mix of organization and personal expression. Methods like daily reflections, memory recording, and tracking goals can add depth to your planning routine.
| Technique | Purpose | How to Apply |
|---|---|---|
| Daily Reflection | Note mood and progress | Write 2-3 lines each day |
| Memory Recording | Capture key moments | Use small spaces near entries |
| Habit Tracking | Keep tabs on routines | Use simple layouts or symbols |
| Goal Setting | Monitor objectives | Add weekly check-in sections |
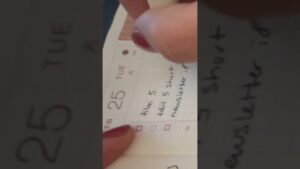
Set aside sections in your planner for tasks, reflections, and journaling. Keep entries short and to the point. Add personal touches like sketches or meaningful quotes to make your pages unique while still easy to navigate. Simple symbols or color codes can help you track habits and accomplishments at a glance.
Block out specific times for journaling to stay consistent without feeling overwhelmed. Use tools like fine-point pens, highlighters, and other supplies that match your style. Leave some blank space for spontaneous thoughts, but ensure your layout remains functional.
Weekly reviews are a great way to evaluate your progress and tweak your approach. Journaling doesn’t just customize your planner – it also boosts its value as a productivity and self-reflection tool. [1][2][3]
A well-designed layout strikes a balance between practicality and style, making your planner not just organized but also enjoyable to use. The Hobonichi Weeks layout is a great example, offering room for both daily plans and notes. To make the most of your layout, think about blending vertical and horizontal elements for better usability.
| Layout Element | Purpose | How to Use It |
|---|---|---|
| Time Blocks | Manage your schedule | Use vertical columns for hourly planning |
| Task Space | Track action items | Dedicate sections on the right page |
| Notes Area | Jot down ideas | Leave open space for flexible note-taking |
| Weekly Overview | Plan the big picture | Add a top section for weekly highlights |
Functional stickers, like headers and icons, can streamline your layout and make it easier to navigate [2]. You can also use visual dividers to separate sections while keeping things tidy. Don’t forget to leave some white space – this helps avoid clutter and gives you room for spontaneity.
You might want to divide your planner into zones for different purposes:
Try out your layout for a couple of weeks using sticky notes or other removable elements. This way, you can tweak it as needed without making anything permanent [2].
Once you’re happy with the structure, you can add extras like trackers and task lists to keep everything even more organized.
Tracking systems help you stay consistent and clearly show your progress. By adding trackers and task lists to your planner, you can make it both functional and visually appealing.
Start with a simple grid to monitor 3-5 key habits like daily exercise, reading, or meditation. Place these trackers at the start of each month so they’re easy to update regularly. Break your tasks into three clear categories: priority items, ongoing projects, and quick wins. This structure helps you stay focused and productive [1].
Use symbols to quickly identify different types of commitments:
Add small progress checkpoints to track your steps toward bigger goals. These visual cues not only keep you motivated but also provide clear feedback on how far you’ve come [2]. You might also want to try using functional stickers made for habit tracking – they can make the process more engaging.
Keep your layout clean and straightforward, focusing on the details that truly matter. A clutter-free design makes it easier to stick with your system and stay motivated [3]. The goal isn’t to track everything – it’s to consistently monitor the habits and tasks that align with your priorities.
Once your habits and tasks are organized, you’re ready to give your planner a personal touch.
Turning your planner into something that feels uniquely yours can make it a tool you love using every day. It’s not just about staying organized – it’s about creating something that motivates and inspires you. Start with the cover: choose a design that matches your style. If you’re using a discbound planner, you can easily rearrange or add pages whenever you need [1].
For a more visually organized layout, try color coding with fine-point pens that won’t bleed through the pages [2]. Thin washi tape and sticky notes can double as both functional tools and decorative elements. You can also include extras like a custom dashboard, clear storage pouches for supplies, and color-coded tabs to make navigating your planner a breeze.
Want to make your planner even more practical and fun? Add sections or tools for different purposes:
"Planning is personal – and I think that’s part of the beauty of it." – I Heart Planners [1]
Start with the basics, and as you figure out what works best for you, add more decorative touches over time [1]. These small changes can turn your planner into a tool that’s not just functional but also a reflection of your personality. Once you’ve personalized it, you’ll be ready to use it for long-term planning and tracking your goals.
Using the right tools can make your planning process smoother and even more enjoyable. Start with essentials like fine-tip, bleed-resistant pens such as Pastel Stabilo 0.4mm fine liners. Add highlighters, washi tape, and sticky notes to keep everything organized. Here’s a quick breakdown of tools and their purposes:
| Tool | Use | Key Features |
|---|---|---|
| Pens | Writing and daily notes | Fine-tip, bleed-resistant |
| Highlighters | Highlighting and color coding | Pastel shades, dual-tip |
| Washi Tape | Dividing sections | Thin, easy to remove |
| Sticky Notes | Temporary reminders | Various sizes, strong adhesive |
| Ruler | Creating neat layouts | Clear, with non-slip edges |
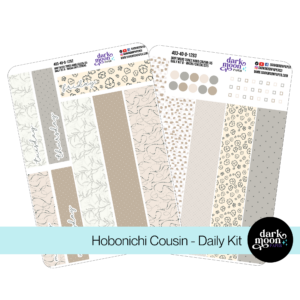
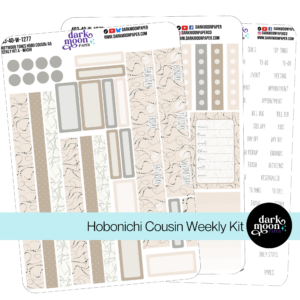
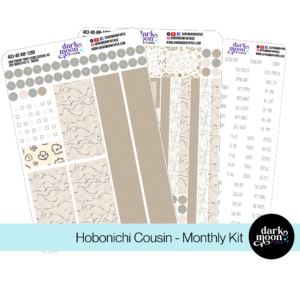
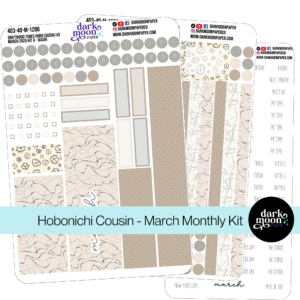
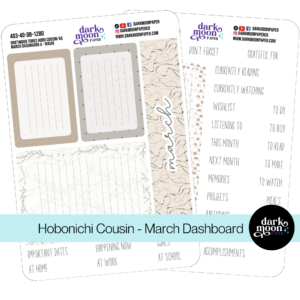
If you’re working with a specific planner format, consider tools tailored to it. For example, a discbound planner benefits from a compatible hole punch, making it easy to add custom pages [1]. Want to add some personality? Look into themed sticker kits from brands like Dark Moon Paper to combine style with practicality.
"The right tools balance functionality and creativity." – I Heart Planners [1]
Finally, keep everything organized in one spot so you can grab what you need without hassle. With your tools ready, you’re all set to plan effectively and track your goals [2].
A future log serves as the long-term planning hub of your planner. It gives you a clear overview of upcoming events, deadlines, and goals, helping you stay organized and avoid scheduling conflicts.
Reserve 2-4 pages for this section, including a monthly calendar for important dates, a notes area for reminders, and space for long-term goals or tasks you might need to carry forward. Here’s a breakdown of what to include:
| Component | Purpose | Suggested Format |
|---|---|---|
| Monthly Calendar | Track key events and deadlines | 6-month or 12-month view |
| Notes Section | Add reminders or details | Bulleted list by month |
| Goal Tracking | Monitor long-term objectives | Quarterly checkpoints |
| Migration Space | List items to revisit or move | Running list format |
Stick to the same color-coding system you’ve used in other sections to maintain a cohesive look. Make it a habit to review your future log every month. This helps you stay aware of commitments and plan ahead effectively.
Once you’ve outlined your long-term plans in the future log, it’s time to break them down into clear, actionable goals for your daily and weekly planning.
Here’s a simple way to organize your goals:
| Goal Type | Timeframe | Example |
|---|---|---|
| Daily Tasks | 24 hours | "Make 3 client calls by 2 PM" |
| Weekly Objectives | 7 days | "Finish project proposal by Friday" |
| Monthly Goals | 30 days | "Work out 12 times; track in planner" |
| Quarterly Projects | 90 days | "Launch website with 5 main pages" |
Make your goals SMART: Specific, Measurable, Achievable, Relevant, and Time-bound. To stay organized, dedicate a Goals Overview page in your planner where you can track progress.
For added clarity, use color-coding to link tasks to their goals:
This approach not only makes your planner visually appealing but also turns it into a practical tool for tracking progress. Include a notes section to jot down obstacles and strategies to overcome them. Regularly assess your goals to ensure they remain realistic and aligned with your priorities. Use your future log to keep an eye on long-term objectives and see how they connect with your daily and weekly plans.
"Regular reviews and adjustments are essential for ensuring that goals remain clear and achievable. By periodically reviewing progress and adjusting goals as necessary, individuals can stay on track, overcome obstacles, and make sure their goals continue to align with their evolving needs and priorities." [4]
Taking time to review your planner regularly ensures it stays useful and doesn’t become a source of stress. A monthly check-in can help you tweak your system so it aligns with your workflow and preferences.
Here’s a simple framework to guide your evaluation process:
| Assessment Area | Key Questions | Possible Adjustments |
|---|---|---|
| Daily Spreads | Are all sections being used consistently? | Remove unused sections or expand busy areas. |
| Task Management | Are tasks being completed or carried over? | Break tasks into smaller steps if needed. |
| Time Blocks | Does your schedule feel realistic? | Adjust block lengths or rearrange timings. |
| Tracking Systems | Are trackers giving you helpful insights? | Drop unused trackers or add more relevant ones. |
Make small adjustments rather than overhauling everything at once. For example, if your weekly layout feels cramped, try expanding it to two pages instead of redesigning your entire planner.
Keep an eye out for these signs that your planner might need tweaking:
Set aside 30 minutes at the end of the month to reflect on what’s working and what isn’t. Your updates should reflect changes in your lifestyle or work. For instance, if you’ve started working both remotely and in-office, you might need sections for each.
Consider dedicating a space in your planner to jot down ideas for improvements. Regular refinements will help your planner stay aligned with your goals and keep it an effective tool for staying organized and productive.
Fine-tuning your planner through regular check-ins helps you build a system that aligns with your goals and lifestyle. A good setup should adapt to your needs, balancing practicality with personal flair.
Start with the basics and add features over time. Whether you prefer the structure of a Hobonichi Weeks or the flexibility of a bullet journal, the key is finding what fits your planning style.
Here’s a simple guide to get started:
| Start With | Add Gradually | Refine Over Time |
|---|---|---|
| Basic layout | Trackers and goals | Personal touches |
| Daily tasks | Goal-setting tools | Creative elements |
| Time blocks | Future planning | Custom features |
Check out online communities for inspiration and tips. Many planners start as simple setups and grow into personalized tools that reflect their users’ needs and preferences.
Keep evaluating your system to make sure it works for you. Focus on how well it supports your day-to-day life and goals, rather than aiming for perfection. By starting with the essentials, adding creative elements, and making adjustments as needed, you’ll create a planner that feels both functional and personal.
With the right mindset, your planner can do more than organize your schedule – it can motivate and inspire you every day.

Stickers Made for Planning
Our custom stickers are a fuss-free way to brighten up your planner pages with perfectly-sized designs that add a spark of personality to every layout.
Why use planner stickers?
Planner stickers make organizing easy, fun, and personal! Add color, creativity, and structure to every page, transforming your planner into a tool that reflects you. Perfect for tracking, decorating, and staying inspired daily!


Hello and welcome!
I’m Rachael Snow, a lifelong artist and entrepreneur, and I started Dark Moon Paper to blend my love of art, technology, and the mysterious beauty of the world around us. My sticker kits are meant to set the mood, tell a story, and give you a little escape from the ordinary.
I work from my cozy studio tucked away in the beautiful woods of Oregon, surrounded by nature and a dark night sky full of stars.