Creating custom sticker sheets for your planner or journal is easier than you think and adds a personal touch to your organization. Here’s how to get started:
Start by designing simple layouts, test printing, and refining your process. Whether for planning or decoration, custom stickers make your journal uniquely yours.
Making custom stickers doesn’t require much. Here’s what you’ll need:
For detailed and intricate designs, a digital cutting machine can be a game-changer. Two popular options are the Cricut Maker 3 and Silhouette Cameo 4. The Cameo 4 is often praised for being budget-friendly and includes a built-in roller feeder, making it great for longer designs.
"I have found, after testing a lot of sticker papers, that the OL177CL works best for the foiling process. This paper has a great affinity for laser toner and its glossy finish repels the foil in unprinted areas beautifully."
– Desi and Adrii, UbyUs
Choosing the right sticker paper depends on your project. Here’s a quick breakdown:
| Paper Type | Best For | Key Features |
|---|---|---|
| Weatherproof Matte Inkjet | Durable stickers | Water-resistant, vibrant colors |
| Standard White Matte | Everyday use | Affordable and versatile |
| Removable White Matte | Planner stickers | Repositionable adhesive |
| Clear Gloss/Matte | Decorative elements | Transparent finish |
| Brown Kraft | Natural look | Gives an organic, earthy aesthetic |
"The absolute best printable sticker paper is the Online Labels Weatherproof Matte Sticker Paper for Inkjet… This printable sticker paper is smooth, which means you can write on it easily! When you print your stickers on this paper, the colors are bright and bold! Lastly, this printable sticker paper is weatherproof and water resistant! If you accidentally get water on to the sticker, you don’t need to worry about the colors bleeding or getting blurry."
– Amber, YayDay Paper Co.
If you’re making planner stickers, keep these tips in mind:
When creating custom stickers, picking the right software is key. Here are some popular options:
Think about whether you need advanced features or prefer simplicity when choosing your software.
Match your design tools to the type of stickers you’re creating. Here’s a quick overview:
| Sticker Type | Best Software | Design Focus |
|---|---|---|
| Task Trackers | Adobe Illustrator | Clean lines, clear text, minimal details |
| Habit Trackers | Canva | Bold colors, simple shapes, easy to read |
| Decorative Elements | Procreate | Custom illustrations, detailed artwork |
| Headers/Titles | Adobe Fresco | Blend of text and artistic elements |
Once you’ve chosen your design method, focus on color and layout to make your stickers stand out.
"Less is more. Attention is a limited resource, and simpler designs are easier to understand."
Before finalizing your designs, print test sheets to check for accurate colors, clear text, proper spacing, and overall balance. Prototyping ensures your stickers look just right before production.
Get your printer ready with the right settings to avoid issues. If you’re using sticker paper, stick to an inkjet printer – laser printers can damage it.
Adjust these settings before printing:
For specific paper types:
Troubleshooting Tips:
Once you’ve printed your design, pick a cutting method based on how detailed your design is and how many stickers you’re making.
Decide between hand cutting or machine cutting depending on your needs. Hand cutting works well for straightforward shapes and smaller batches, while machine cutting is better for complex designs and higher volumes.
Hand Cutting
Machine Cutting
Here are some practical ways to store your stickers:
"Vertical storage can be useful in a variety of situations, saves space, and helps you easily see your belongings." – Aubree Originals
For a personal touch, Emm of @planwithemm at Archer & Olive customizes storage pouches by decorating them with stickers and adding custom labels. This makes it simple to identify the contents at a glance.
Once your stickers are safely stored, organizing them becomes much easier.
After storing your stickers, organizing them by themes or features can help you find what you need quickly.
Here’s how to categorize them:
For larger collections, consider creating a digital inventory. A simple spreadsheet can track details like themes, quantities, storage locations, and how often you use each type.
Pro Tips:
Making your own custom sticker sheets can be straightforward and fun. With Canva’s free templates and easy-to-use tools, you can design stickers that perfectly suit your style and needs.
Here’s how to get started with an A5 document:
These practical steps tie into the earlier sections on design and layout, helping you move smoothly from creating to producing your stickers.
Start with the basics – simple shapes and tools are great for beginners. Once you’re comfortable, try experimenting with different types of sticker paper and cutting methods to bring more variety to your creations.
Pro Tip: Use a simple grid system to organize your stickers. This keeps your layouts neat and ensures you make the most of your sticker paper. By sticking to these tips and staying consistent, you’ll be crafting polished sticker sheets that elevate your planning or journaling in no time.

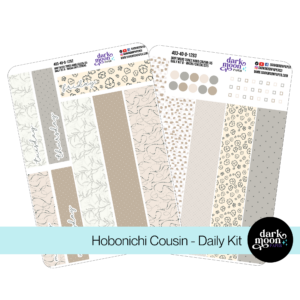
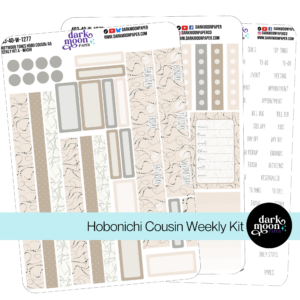
Stickers Made for Planning
Our custom stickers are a fuss-free way to brighten up your planner pages with perfectly-sized designs that add a spark of personality to every layout.
Why use planner stickers?
Planner stickers make organizing easy, fun, and personal! Add color, creativity, and structure to every page, transforming your planner into a tool that reflects you. Perfect for tracking, decorating, and staying inspired daily!


Hello and welcome!
I’m Rachael Snow, a lifelong artist and entrepreneur, and I started Dark Moon Paper to blend my love of art, technology, and the mysterious beauty of the world around us. My sticker kits are meant to set the mood, tell a story, and give you a little escape from the ordinary.
I work from my cozy studio tucked away in the beautiful woods of Oregon, surrounded by nature and a dark night sky full of stars.