Improving your handwriting doesn’t have to be hard. This guide breaks it into simple steps so you can write clearly, neatly, and consistently. Here’s what you’ll learn:
With just 10–15 minutes a day, you can transform your handwriting into something you’re proud of. Keep reading for detailed steps, tips, and tools to get started.
Take a moment to evaluate your writing style and pinpoint areas that could use improvement.
Grab a blank, unlined sheet of paper and jot down a quick note about your day. This sample will help you assess key aspects of your handwriting:
| Aspect | What to Check | Signs of Good Writing |
|---|---|---|
| Baseline | Letter alignment | Straight, consistent line |
| Size | Letter height | Uniform and proportionate letters |
| Spacing | Gaps between letters/words | Even, readable spacing |
| Slant | Letter tilt | Consistent angle |
| Pressure | Ink/pencil mark depth | Moderate, uniform pressure |
"There’s no link between intelligence and writing well, but there’s a high correlation between academic achievement and writing well".
Use these elements to identify common challenges that may affect the clarity and appearance of your writing.
Here are some frequent handwriting problems to watch for:
"Being left-handed in itself isn’t a disability, and most left-handers learn to write perfectly well".
Other factors to consider include:
Studies suggest that handwriting challenges are more commonly reported among boys than girls, but with the right guidance and practice, most people can improve. If these issues persist, consulting a handwriting expert can help uncover deeper causes and provide tailored solutions.
Once you’ve identified areas for improvement, you’ll be ready to focus on refining your basics in the next step.
Create a comfortable and ergonomic workspace:
Position your writing hand for better control:
| Aspect | Right-Handed Writers | Left-Handed Writers |
|---|---|---|
| Paper Angle | 20–45° counterclockwise | 30–45° clockwise |
| Pen Direction | Blunt end points toward the shoulder | Blunt end points toward the shoulder |
| Hand Placement | Below the pencil tip and under the writing line | Below the pencil tip and under the writing line |
Make sure your hand, wrist, and elbow stay below the pencil tip and writing line. Use your non-writing hand to stabilize the paper and support your body weight to prevent sliding.
Experiment with either the Tripod or Quadrupod grip and keep your fingers relaxed. If your knuckles turn white, your grip is too tight. Let your wrist and forearm handle most of the movement instead of relying solely on your fingers.
Once you’ve nailed your posture and grip, it’s time to pick tools that help you practice consistently.
Here are some recommended tools to enhance your writing experience:
Fountain pens provide a fluid and effortless writing experience. Look for tools that require minimal pressure and pair them with high-quality paper to avoid ink bleeding. Ensure your tools are compatible with your writing angle.
For structured practice, the Leuchtturm1917 Bullet Journal system is a great choice. It combines space for writing exercises with organizational features. In 2023, Leuchtturm1917 teamed up with New York Times bestselling author Jon Acuff to launch the "Finish Journal", a tool designed to help users build consistent writing habits and achieve personal goals.
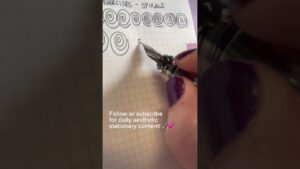
Start with the fundamental strokes that make up all letters. Focus on these three key strokes:
Before diving into letter formation, warm up for about 5 minutes by drawing zigzag lines. This helps develop rhythm and muscle memory. When practicing, use paper with four guidelines to structure your writing:
| Guideline | Purpose |
|---|---|
| Ascender Line | Marks the top limit for tall letters (e.g., b, d, h) |
| X-height Line | Indicates the standard height for most letters |
| Baseline | The main line where letters sit |
| Descender Line | Shows the lower limit for letters like g, j, and p |
Consistent spacing is key to clear handwriting. Work on balancing the space inside letters (counterspace) and the space between letters (letterspace). A helpful trick is to group letters in sets of three, ensuring the middle letter aligns naturally in the center.
To maintain uniform spacing, imagine vertical strokes as the posts of a picket fence, evenly spaced and aligned.
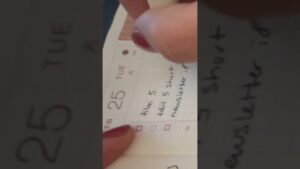
Once you’ve practiced strokes and spacing, apply these skills in your journal every day. This will help reinforce your technique and make it second nature.
"If you slow down, you become more mindful of putting pen to paper, hence paying closer attention to achieving consistency in letter forms, so that, for example, every letter ‘D’ is written the same way every time. There is also no substitute for practice, whether it be as formal as handwritten drills or just writing that daily to-do list."
Here are some fun and effective ways to practice:
Pick an alphabet style you admire and study its proportions, slants, connection points, and spacing. For an extra challenge, try writing with your non-dominant hand in mirror image. It’s a great way to improve control and awareness.
After mastering basic letter formation, it’s time to pick a handwriting style that feels like you. Generally, handwriting falls into two main categories: cursive and print. Cursive features flowing, connected letters – perfect for expressive journaling. Print, on the other hand, offers clean, structured characters, making it ideal for detailed planning.
When deciding on a style, think about what feels comfortable, stays legible, and reflects your personality.
"Handwriting is a very fluid, personal thing that is always evolving… focus on making clearly formed alphabet characters that are clear and legible." – Lindsey Bugbee
Once you’ve chosen your style, you can enhance it with small decorative touches that add flair without sacrificing clarity.
Decorative details can make your handwriting stand out, but subtlety is key. Here are five areas where you can add embellishments without losing readability:
| Location | Tip for Decoration |
|---|---|
| Upper loops | Use oval shapes for smooth flourishes |
| Lower loops | Cross lines at about 90° angles |
| T-crossbars | Avoid crossing two thick lines |
| Word endings | Keep embellishments minimal and balanced |
| Under words | Space accents evenly for harmony |
These tips borrow from calligraphy techniques. As Loveleigh Loops wisely says, "Do not sacrifice legibility when adding style".
With these enhancements, your handwriting will naturally flow into creating a planner that feels uniquely yours.
Now that your handwriting has leveled up, you can bring that energy into your planner. Use fine felt-tip markers for precision, focus on even spacing, and practice daily to refine your skills. Test different pens to find one that provides smooth ink flow and feels comfortable to hold. By taking a thoughtful approach, you’ll create a planner that’s both practical and visually appealing.
Spend 10–15 minutes each day practicing during the time you’re most alert. Make sure your writing space is organized and comfortable. Here’s how to create a productive routine:
"The main obstacle to consistent writing practice is that we don’t plan to get the work done." – Heather Campbell
Once you’ve got a routine in place, work on overcoming any recurring problems. Here are a few common issues and tips to tackle them:
Experiment with different writing tools to find what feels most comfortable for you.
"Improving your handwriting does take LOTS of practice, especially focused practice. Most importantly, you will need to slow down – even the best hand letterers and calligraphers take their time when working on their craft!" – Lettering League
The ScoreWrite System© offers a structured way to monitor your improvement using color-coded assessments. Here’s how you can keep track:
Using note cards to track mastered letters can be a great visual motivator. Focus on keeping your letters consistent in size and spacing. Regular reviews will help you stay on track and reinforce the techniques you’ve been practicing.
Improving your handwriting comes down to consistent practice and attention to a few important basics:
"Your handwriting reflects your personality and mood. Focus on making it clear and legible rather than aiming for perfection, and appreciate its unique qualities." – Lindsey Bugbee
With these tips in mind, dedicate time each day to work on your handwriting skills.
Make these techniques part of your daily life to see real improvement. Here are a few ways to build consistent habits:
"Focus on progress, not perfection." – Dee Quine
Work on making your handwriting clear and consistent, and embrace its unique qualities that showcase your personality.

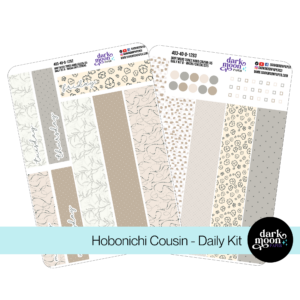
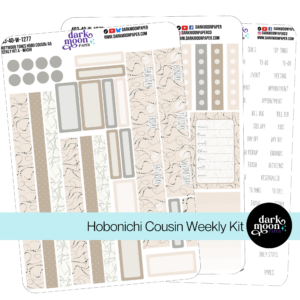
Stickers Made for Planning
Our custom stickers are a fuss-free way to brighten up your planner pages with perfectly-sized designs that add a spark of personality to every layout.
Why use planner stickers?
Planner stickers make organizing easy, fun, and personal! Add color, creativity, and structure to every page, transforming your planner into a tool that reflects you. Perfect for tracking, decorating, and staying inspired daily!


Hello and welcome!
I’m Rachael Snow, a lifelong artist and entrepreneur, and I started Dark Moon Paper to blend my love of art, technology, and the mysterious beauty of the world around us. My sticker kits are meant to set the mood, tell a story, and give you a little escape from the ordinary.
I work from my cozy studio tucked away in the beautiful woods of Oregon, surrounded by nature and a dark night sky full of stars.